Prerequisites
Permissions to View/Edit Alerts Settings required
Overview
The Incident Report is a simple, web-accessible form that enables staff to report suspicious activity in real time. It can be accessed via a unique URL or QR code, making it usable by anyone with internet access—even if they don’t have a Kinectify account.
Once submitted, the report generates an Incident Alert in the system. These alerts are scored at 100 by default, as they are considered high-risk due to being staff-reported. The alert can then be reviewed, escalated to a case, or resolved like any other suspicious activity alert in the alert module.
Accessing the Incident Form
Go to the Alerts Settings page
Scroll to the Incident Reporting section
Click Share Link to copy the URL or Download QR to get the QR code
You can also scan the QR code directly from the settings page to open the form instantly
Both the URL and QR code direct users to the incident form

Filling Out the Incident Form
The form is divided into three sections:
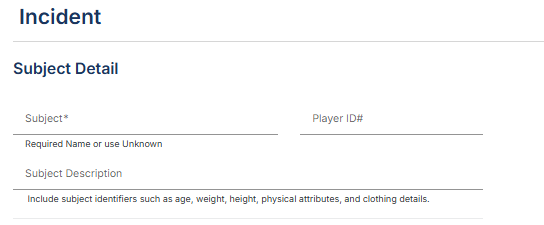
Subject Detail
Enter the name of the individual (or “unknown” if not known)
Optional fields: Player ID and a Subject Description with identifying details
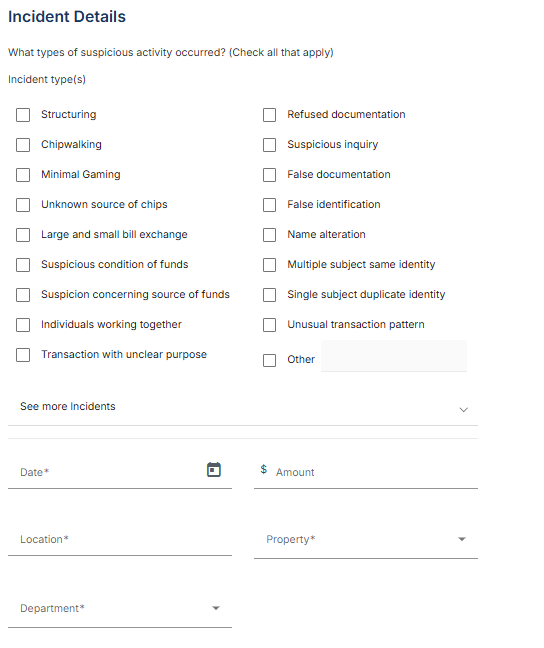
Incident Details
Select from common suspicious activity types, if the activity is not listed, choose the “Other” option and input the suspicious activity that occurred.
Required: Date, location, property, and Department. If you choose Other for the department, enter it in the field that appears. Dates and times use the property's time zone
Optional: Amount involved and description of the incident
Reported By
Required: Reporter’s name and employee ID
Optional: whether surveillance and security were notified, whether law enforcement was contacted (with who was contacted, a contact number and the date and time), additional comments, and file attachments. You can attach more than one file
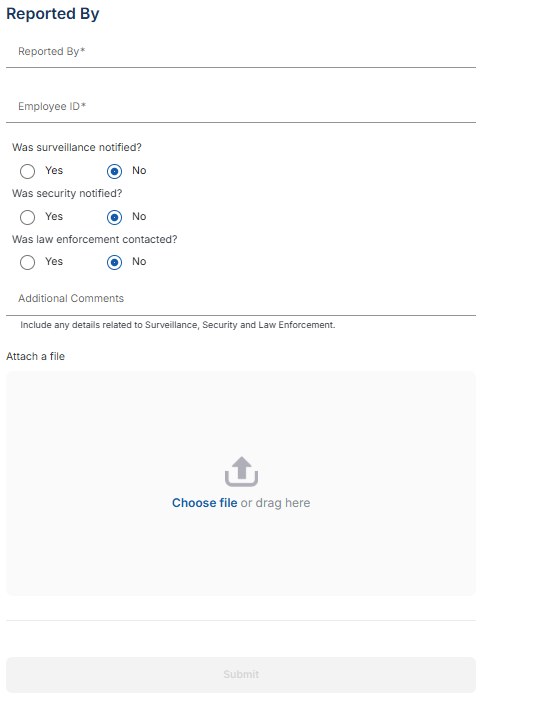
Once all required fields are completed, click Submit to send the report.
Reviewing Incident Alerts
Incident alerts are created as soon as the form is submitted, with the type AML – Incident. They don't wait for the scheduled alert monitoring.
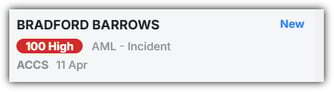
Each alert includes the reporter’s name and submission timestamp
The Evidence tab displays all the information submitted through the original incident report form
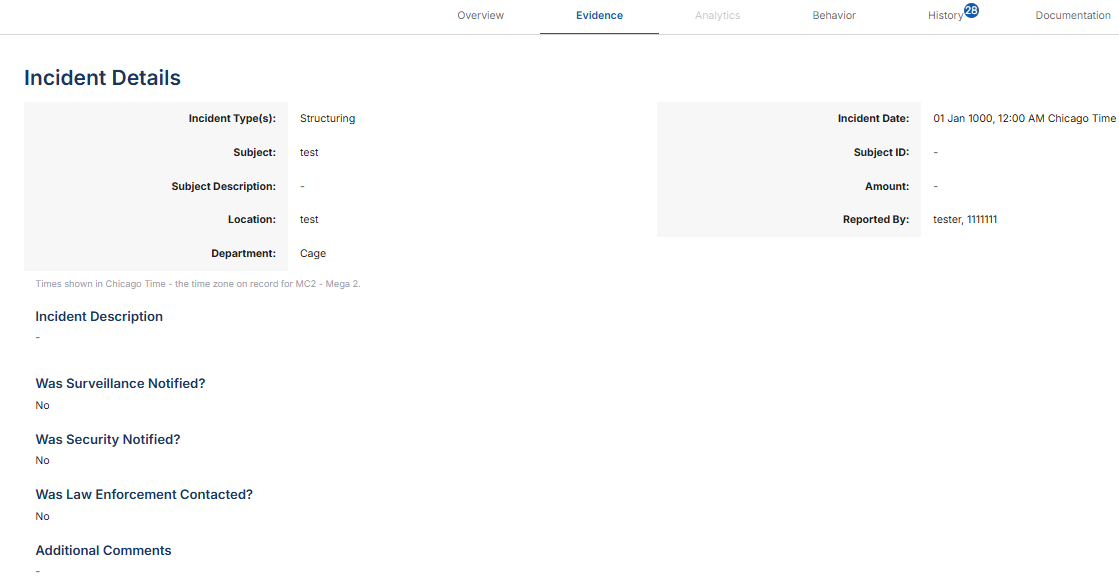
Incident alerts are listed in Logs > Incident Alert, which needs the Incident Alert log permission. Use the filter icon to narrow the list and the export icon to download it. If your organization has both Active and Legacy alerts, use the Active | Legacy toggle to switch between them.
If a Player ID is included and matches an existing profile, the alert will also appear on the player’s Alerts tab
On an Active incident alert, the Overview tab lists the risk factors, the Evidence tab shows the incident report details, the Analytics tab is turned off, and the Documentation tab holds the incident's attachments and notes
While an incident alert is New, Assigned or In Progress, you can correct it with Edit Subject or Edit Property in the alert header. Both require a comment. A replaced subject and the updated title are carried to the linked case and SAR
You can set up auto-assignment groups so incident alerts are assigned automatically, using the Incident Reports rule type
Correcting the Subject on an Incident Alert
Incident reports are often submitted by employees who don't know who the subject is. When that happens, the incident alert is created. You can correct the subject directly on the alert. When the alert's subject is replaced and saved, the primary subject of any case escalated from that alert is updated to the new subject. If the case has a SAR that is still editable, the SAR is updated to the corrected subject.
To replace the subject:
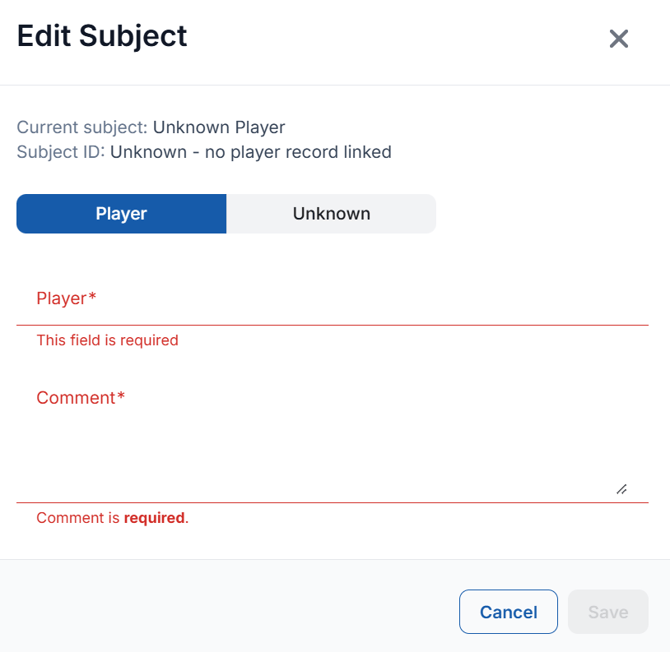
Open the incident alert and select the edit (pencil) icon next to the subject name in the alert header. The Edit Subject window opens and shows the alert's current subject and Subject ID for reference.
Use the Player to attach a known player, then search by either player name or player ID and select the correct match. Choose Unknown to enter a descriptive subject name without linking a player record.
Enter a comment explaining the change. A comment is required before the change can be saved.
Select Save.
Case and SAR Escalation
Incident alerts follow the standard alert workflow. They can be resolved as not suspicious or escalated to a case and SAR. If the player is unknown, the case must be marked as such.